
Sementara AI MultiLipi menangani pekerjaan berat, mempertahankan suara merek yang konsisten membutuhkan sentuhan manusia. Apakah Anda perlu memperbaiki istilah teknis atau menyesuaikan nada untuk pasar tertentu, MultiLipi menyediakan dua antarmuka yang kuat untuk mengelola konten Anda: Manual Editor (untuk pembaruan massal) dan Visual Editor (untuk konteks di halaman).
Kedua metode memungkinkan Anda untuk mengedit, menyempurnakan, dan menerbitkan perubahan secara instan ke situs langsung Anda.
Mengapa Pengeditan Manual Penting
Menyempurnakan terjemahan AI membantu menjaga konsistensi merek, memperbaiki terminologi teknis, mengoptimalkan kata kunci SEO lokal, dan memastikan relevansi budaya di seluruh pasar.
Metode 1: Editor Manual (Manajemen Massal)
Terbaik untuk: Meninjau daftar teks dengan cepat, memperbaiki terminologi, dan mengoptimalkan kata kunci SEO.
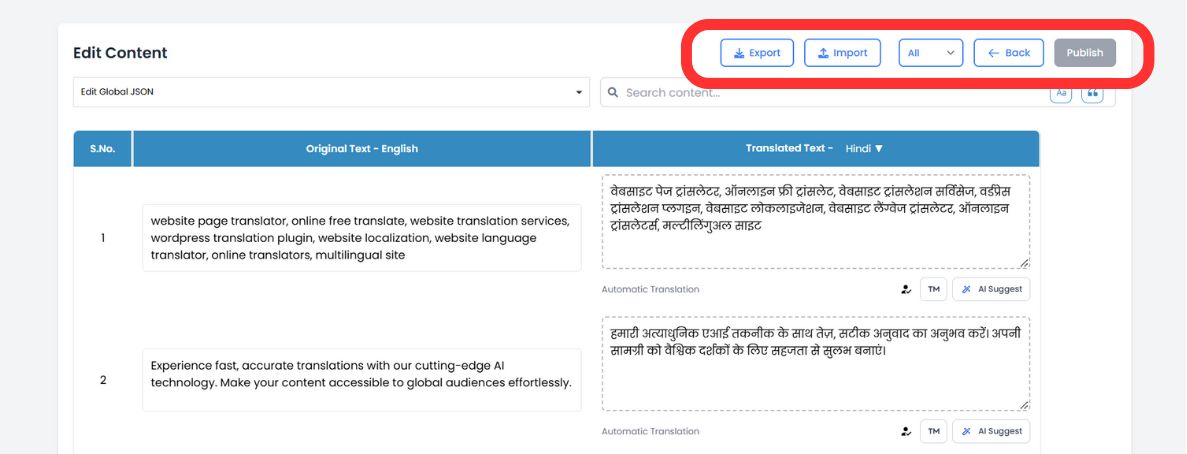
Editor Manual menawarkan tampilan sumber dan teks terjemahan yang efisien dan berdampingan, sehingga memudahkan untuk mengaudit konten secara efisien.
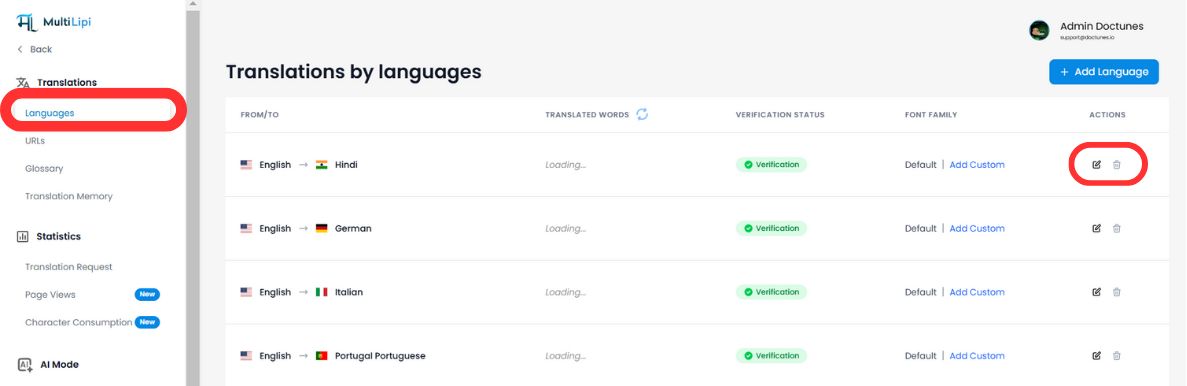
Langkah 1: Akses Dasbor Proyek
Masuk ke dasbor MultiLipi Anda dan klik Proyek di bilah samping. Pilih domain tertentu yang ingin Anda kelola.
Langkah 2: Pilih Bahasa Target
Pilih bahasa yang ingin Anda edit (misalnya, "Prancis"). Sistem akan memuat daftar lengkap semua string teks yang ditemukan di situs Anda bersama terjemahannya saat ini.
Langkah 3: Edit Konten
Klik di dalam kotak terjemahan apa pun untuk mengubah teks. Anda dapat menggunakan bilah pencarian atas untuk langsung menemukan frasa, nama produk, atau judul tertentu yang perlu diperhatikan.
Langkah 4: Manfaatkan Saran AI (Baru)
Saat Anda mengedit, mesin AI kami sekarang menganalisis teks Anda secara real-time. Lihat di bawah setiap bidang untuk Saran Cerdas disesuaikan untuk meningkatkan keterbacaan dan kinerja SEO.
Ganti Sekali Klik
Jika AI menyarankan frasa yang lebih baik (atau cocok dengan istilah dari Glosarium Anda), cukup klik saran untuk langsung menukarnya ke bidang editor.
Langkah 5: Publikasikan
Setelah puas, klik tombol Menerbitkan tombol di sudut kanan atas. Pembaruan Anda segera didorong ke jaringan global.
Metode 2: Editor Visual (Tinjauan Dalam Konteks)
Terbaik untuk: Penyesuaian UI/UX, salinan pemasaran, dan memperbaiki jeda tata letak.
Konteks adalah segalanya. Editor Visual memungkinkan Anda menelusuri situs web Anda yang sebenarnya dan mengedit terjemahan langsung di layar, memastikan teks Anda sangat cocok dengan desain Anda.
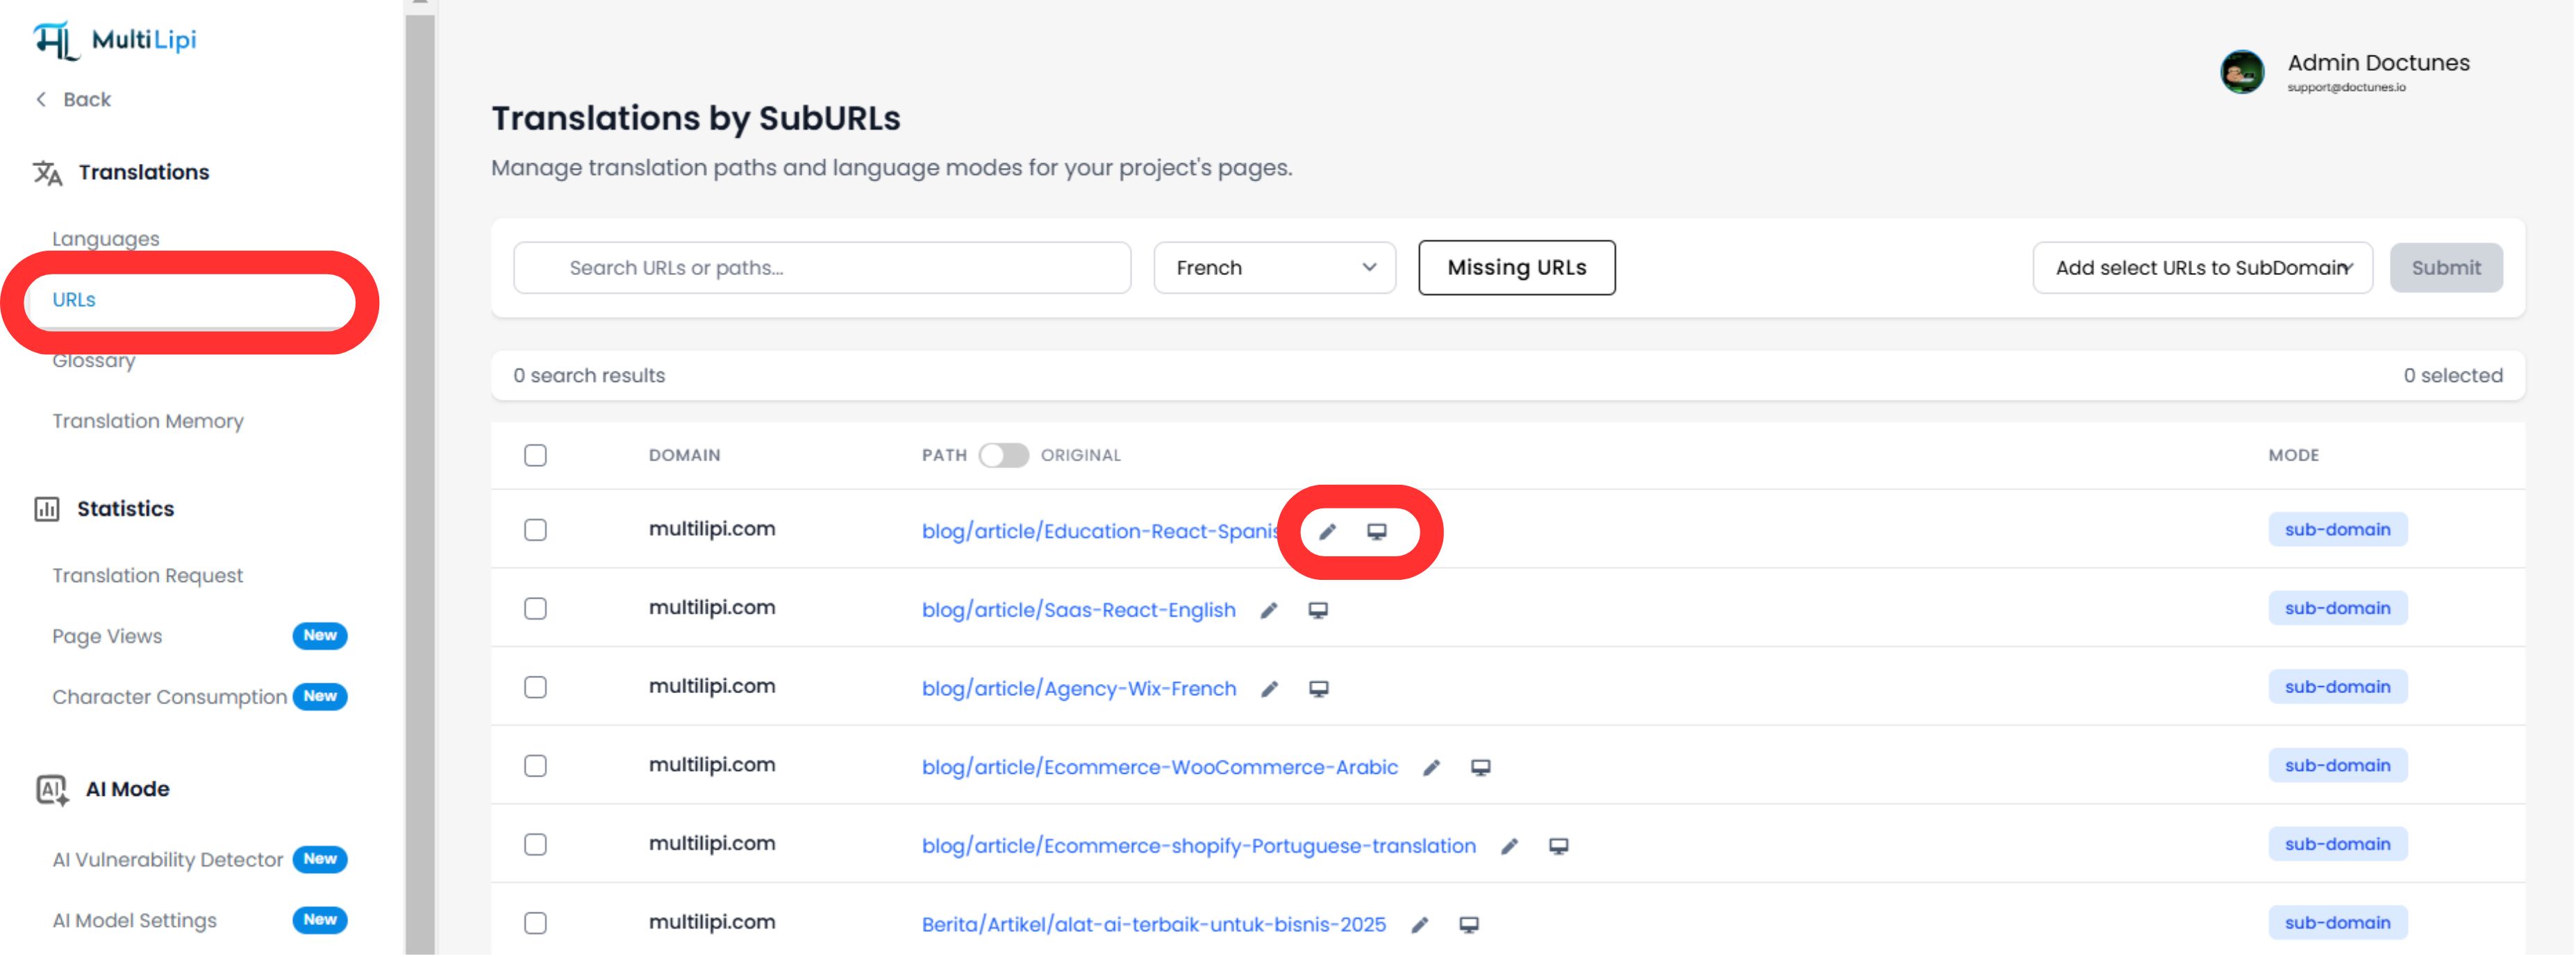
Langkah 1: Luncurkan Antarmuka
Navigasikan ke Terjemahan > URL di bar samping dasbor. Anda akan melihat daftar semua halaman yang diindeks.
Langkah 2: Buka Live View
Klik tombol Ikon Editor Visual (🖥️) di samping halaman yang ingin Anda edit. Ini membuka pratinjau langsung dan interaktif situs Anda dalam bahasa yang dipilih.
Langkah 3: Klik untuk Mengedit
Cukup klik elemen teks apa pun—judul, tombol, atau paragraf—untuk membuka editor sebaris.
Pemeriksaan Tata Letak Real-Time
Segera lihat apakah terjemahan terlalu panjang dan merusak desain Anda.
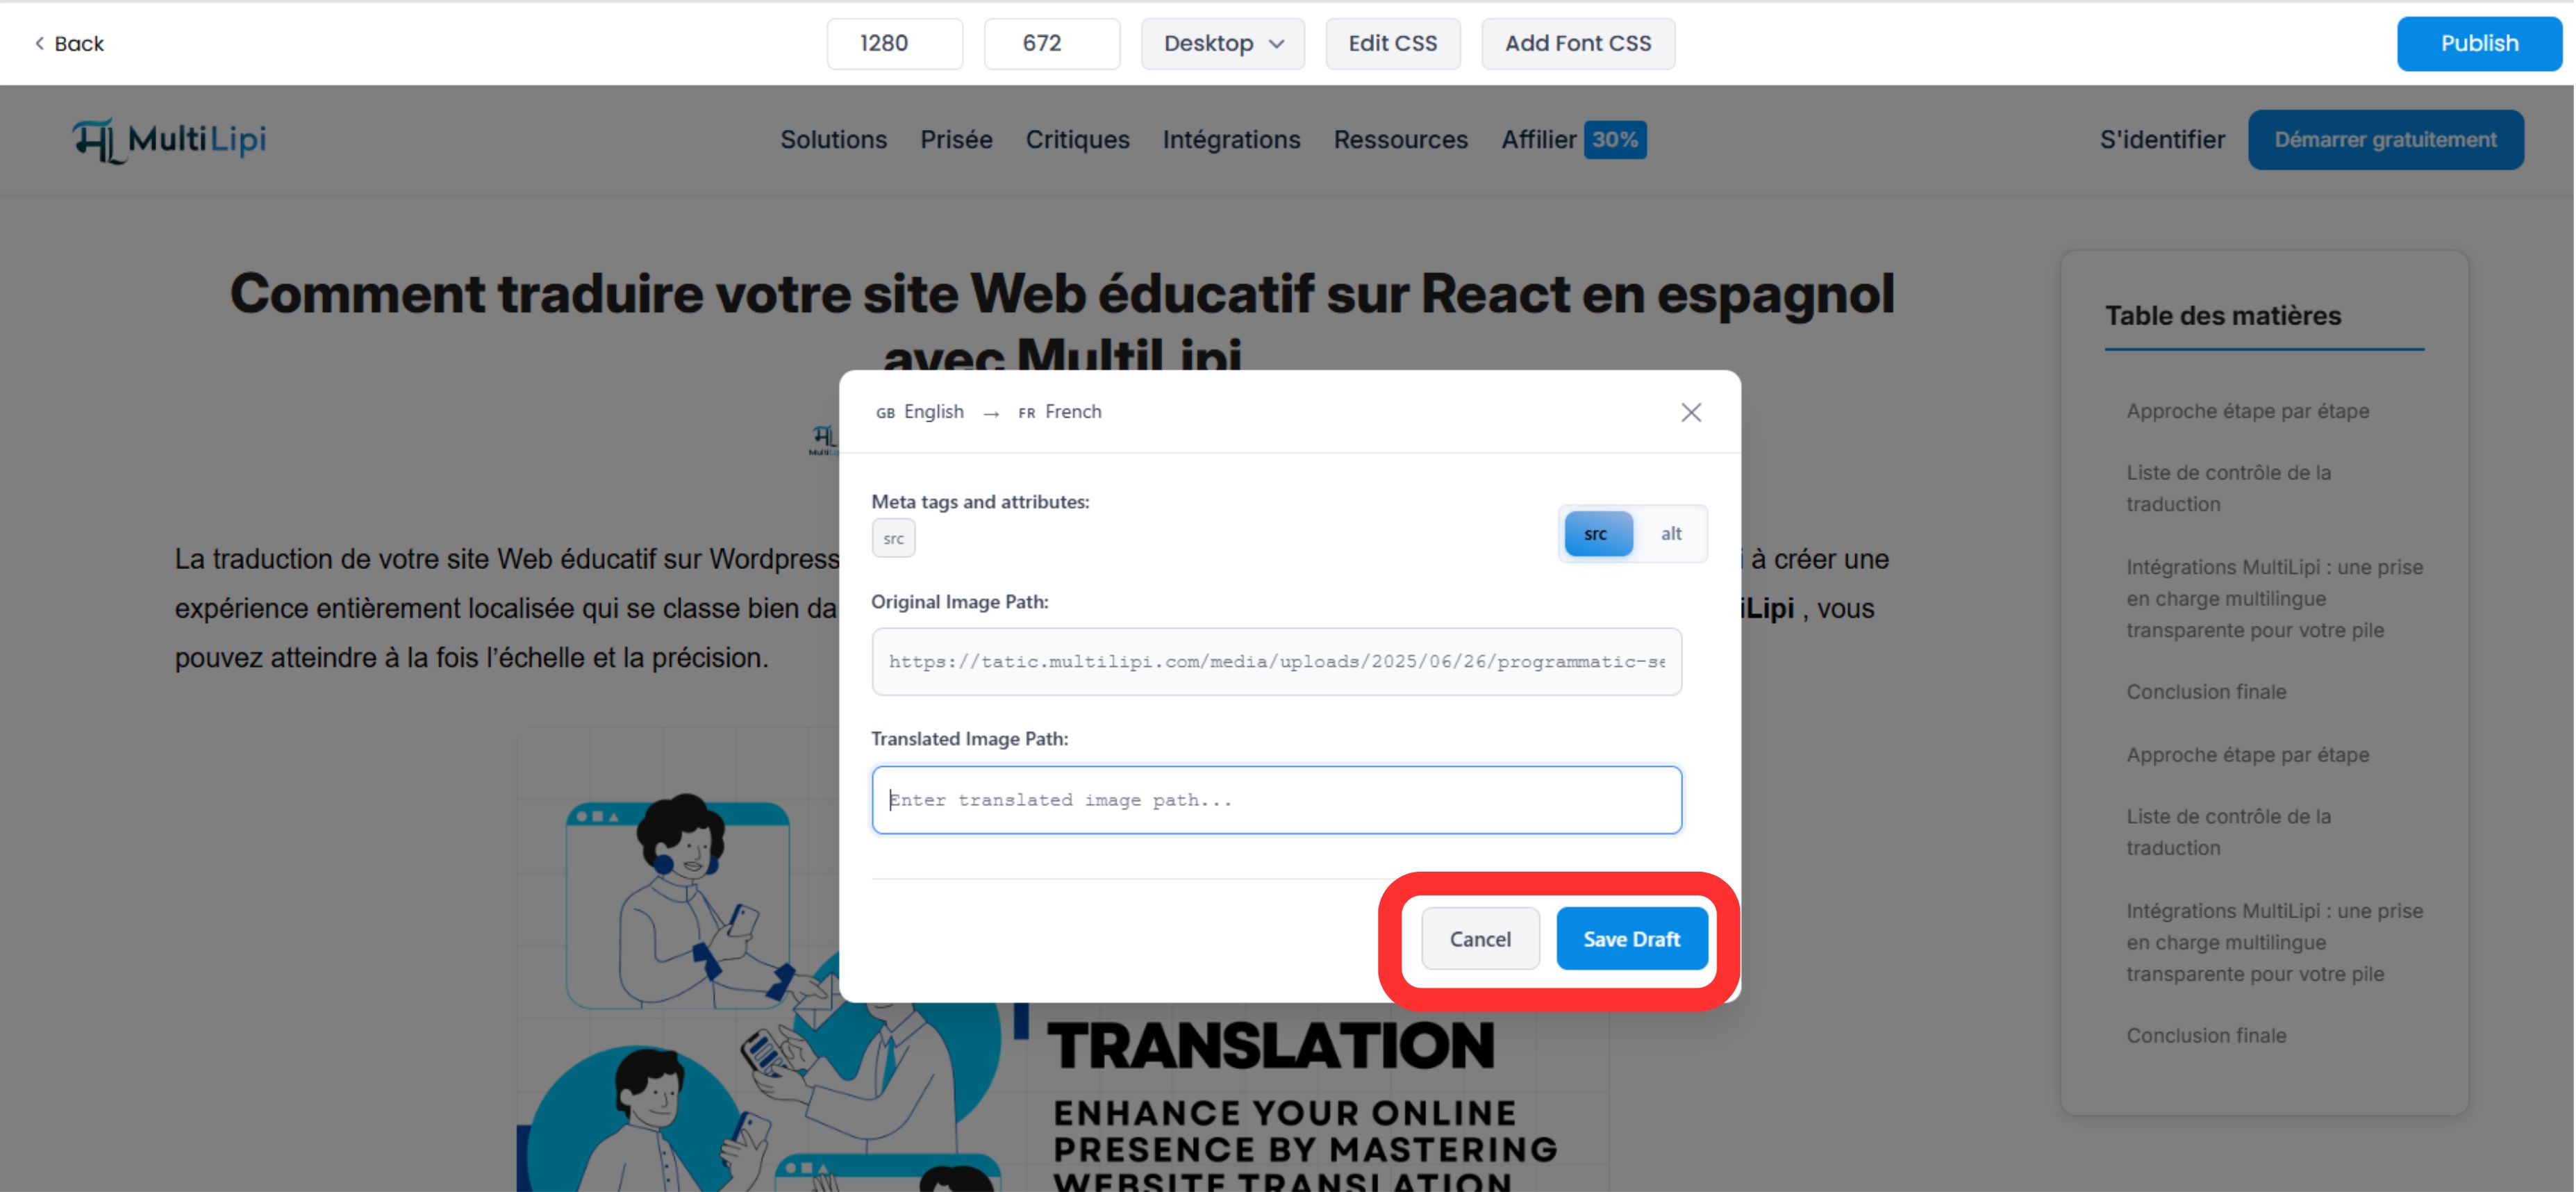
SEO Gambar
Klik gambar untuk menerjemahkan Tag Alt secara langsung, meningkatkan visibilitas Anda di Google Gambar untuk wilayah tersebut.
Langkah 4: Terapkan Peningkatan AI
Editor Visual sekarang menyertakan alat konteks lanjutan:
- • Penggeser Nada: Sesuaikan formalitas (misalnya, Profesional vs. Ramah) dan biarkan AI menulis ulang salinan agar cocok.
- • Deteksi Ketidaksejajaran: Sistem secara otomatis menandai salinan yang mungkin terlihat rusak atau tidak sejajar.
Langkah 5: Publikasikan
Klik Menerbitkan untuk mendorong perubahan Anda secara langsung. Anda dapat beralih bahasa melalui dropdown atas untuk mengulangi proses untuk wilayah lain tanpa meninggalkan halaman.
Mengapa Ini Penting untuk Pertumbuhan
Pengeditan bukan hanya tentang memperbaiki kesalahan; itu adalah Strategi konversi .
Sinyal Kepercayaan
Kesalahan tata bahasa dalam tombol checkout dapat membunuh penjualan. Tinjauan manual cepat memastikan "Halaman Uang" (Harga, Checkout) Anda terasa asli dan dapat dipercaya.
Otoritas SEO
Menggunakan Editor Manual untuk menyisipkan kata kunci lokal bervolume tinggi (misalnya, mengubah "Ponsel" menjadi "Handy" untuk Jerman) dapat secara signifikan meningkatkan peringkat pencarian lokal Anda.
💡 Kiat Pro: Gabungkan kedua editor dalam alur kerja Anda. Gunakan Editor Manual untuk perbaikan terminologi massal dan pengoptimalan SEO, lalu beralih ke Editor Visual untuk memverifikasi bahwa perubahan terlihat sempurna dalam tata letak desain Anda yang sebenarnya.